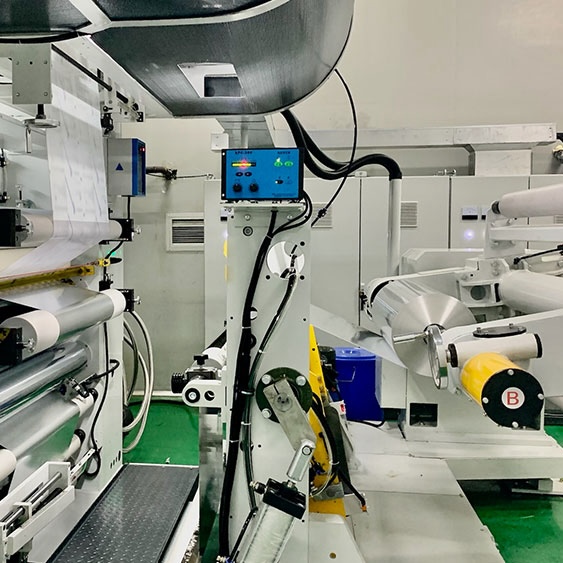
Changing the film on a laminator may seem tricky at first, but with the right steps, it becomes a quick and simple process. Properly loading a new roll of laminating film ensures smooth operation and high-quality results. This guide will walk you through the process, step-by-step, covering the tools you’ll need and some expert tips for a seamless change.
Step 1: Power Down and Prepare Your Workspace
Safety comes first when changing laminator film. Start by turning off and unplugging the laminator to avoid any burns or accidental malfunctions. Laminators reach high temperatures, so be sure it’s cooled down before handling.
Clear any clutter around the machine to make space for the film and any tools you’ll need, like scissors, a cleaning cloth, and possibly heat-resistant gloves if the laminator is still warm. A clean, organized workspace reduces the risk of dust or debris getting on the film, which can affect the lamination quality.
Step 2: Remove the Old Film
Once the laminator is safely powered down and cooled, it’s time to remove the old film. Follow these steps for a smooth removal:
- Cut the Film: Using scissors, cut the film on both the top and bottom rolls. This will allow you to remove each roll without disturbing the machine’s tension settings.
- Release the Tension: Most laminators have a tension knob or lever. Release the tension so the rolls can be removed easily.
- Remove the Film Rolls: Pull out both the top and bottom rolls of film carefully. Place them aside for disposal or recycling if applicable.
By removing the old film carefully, you prevent leftover pieces from getting jammed in the machine when the new film is installed.
Step 3: Clean the Rollers and Check for Residue
With the old film removed, take a moment to inspect and clean the laminator rollers. Dust, adhesive residue, and film fragments can collect on the rollers, causing streaks or bubbles on newly laminated items. Use a soft, lint-free cloth to wipe down the rollers.
If you notice adhesive buildup, a gentle cleaner specifically made for laminators can help dissolve the residue. Keeping the rollers clean ensures smooth, bubble-free lamination and prolongs the life of the machine.

Step 4: Load the New Film Roll
Now it’s time to load the new roll of laminating film. Here’s how to do it correctly:
- Align the Film with the Mandrels: Most laminators have two mandrels (one for each roll of film). Slide the new roll of film onto the top and bottom mandrels, ensuring that the film is aligned correctly for feeding through the machine.
- Check the Adhesive Side: Make sure the adhesive side of the film is facing outward on both the top and bottom rolls. This is essential for bonding the film to your materials effectively.
- Center the Roll: Center the film roll on the mandrel to ensure even coverage on both sides during lamination. Misalignment can cause uneven lamination or excess film waste.
Once the film is aligned, secure the rolls in place by re-engaging the tension knob or lever.
Step 5: Thread the Film Through the Laminator
This step requires careful handling to ensure the film feeds through the machine correctly:
- Feed the Film into the Rollers: Pull a few inches of film from both the top and bottom rolls and feed it toward the rollers. Many laminators have a threading diagram to guide you on the correct film path, so check for this if available.
- Layer the Films Together: Place the top and bottom films together and press them between the rollers. Some users place a piece of scrap paper between the films as they start threading to help guide the film and prevent sticking.
- Close the Rollers: If your laminator has a roller lock mechanism, engage it to hold the films in place as they begin threading through the machine. Ensure there’s enough film to reach the machine’s exit without any slack.
Step 6: Power On and Test the Laminator
With the new film loaded and threaded, it’s time to turn the laminator back on. Allow it to reach operating temperature if it’s a thermal laminator. Once the machine is ready, perform a quick test:
- Run a Test Sheet: Feed a test sheet or a piece of scrap paper through the laminator to ensure the new film is feeding smoothly and bonding correctly.
- Check for Any Issues: Look for signs of uneven lamination, bubbling, or streaks. If you spot any issues, power down the machine and adjust the film alignment or tension.
Testing with a sample ensures that the new film roll is properly installed and that the lamination quality meets your standards.
Troubleshooting Common Film Loading Issues
If you encounter any issues while changing the film, here are some quick fixes:
- Film Wrinkles or Bubbles: This can be caused by uneven tension. Adjust the tension knobs on the top and bottom rolls to balance the film feed.
- Film Not Adhering Properly: Check the adhesive side to confirm it’s facing outward on both rolls. Also, ensure the machine has reached the correct temperature.
- Film Jams: A film jam usually happens when the film isn’t threaded correctly. Turn off the machine, remove the film, and re-thread it following the proper path.
These troubleshooting steps can resolve most issues, helping you achieve a smooth, professional lamination.
Maintenance Tips for Long-Term Laminator Performance
Regular maintenance keeps your laminator in top working condition and reduces the frequency of issues like film jamming or poor adhesion. Here are some tips:
- Clean the Rollers Regularly: Sticky residue builds up over time, so make cleaning the rollers a regular practice.
- Use Quality Film: Poor-quality film can damage the laminator and affect lamination results. Invest in high-quality film designed for your specific machine.
- Store the Laminator Properly: When not in use, store the laminator in a clean, dust-free area. Cover it to prevent dust buildup on the rollers.
By following these simple maintenance steps, you’ll ensure smooth operation and extend the life of your laminator.
Conclusion
Changing the film on a laminator might take a few tries to perfect, but with practice, it becomes a simple, routine process. With the right steps, from powering down and cleaning the machine to carefully threading the new film, you can ensure smooth operation and high-quality lamination every time. A well-maintained laminator with properly loaded film will deliver clear, durable results for your documents, projects, and displays.


